Microsoft Word helps you with its spelling and grammar check, which is a wonderful feature. But do you find yourself ignoring the same grammar suggestions regularly? Or maybe you’re curious why Word isn’t catching something you wish it would. You can adjust your default grammar settings in Word to look for what you want. And as a bonus, these grammar settings will apply if you use the Microsoft Editor to check your writing in Word.
Access the Grammar Settings in Word
You’ll access the grammar settings in Word a bit differently on Windows versus Mac.
Grammar Settings on Windows
Open Word on your Windows computer to any document.
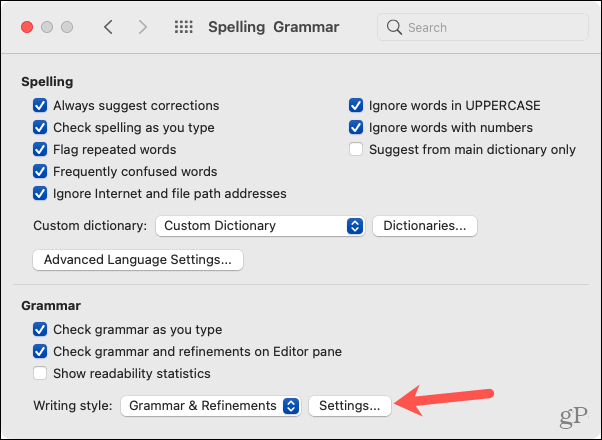
Grammar Settings on Mac
Open Word on your Mac to any document.
Review and Adjust the Default Grammar Settings
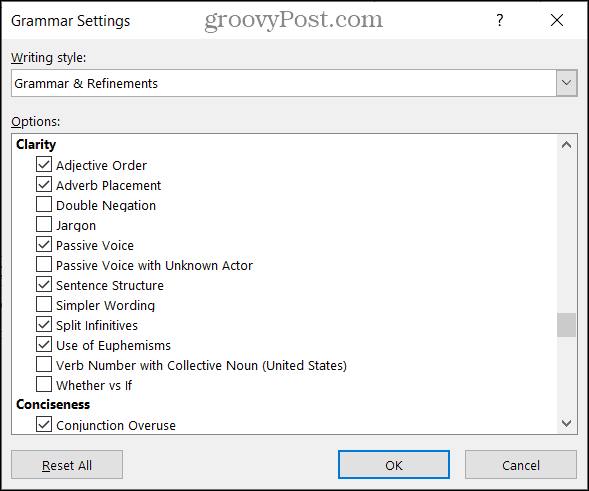
When the Grammar Settings window opens on Windows or Mac, you can adjust the Writing style at the top if you wish. This allows you to change the default settings separately for each: Grammar and Grammar & Refinements. Review each of the options in the list. Mark the checkboxes for those you want Word to look for and uncheck any that you no longer want to worry about.
You’ll see many, many grammar options. You can have Word check for everything from “Adjective Used instead of Adverb” to “Wrong Verb Tense.” You’ll find some super helpful options for the grammar check as well, like passive voice, confusion between “Who” and “Whom,” and even embarrassing words. Take your time to review these settings. You’re bound to find at least one or two that you want to adjust. Additionally, you may see several subsections like Clarity, Conciseness, and Formality. These grammar checks work with the Microsoft Editor to assist with the refinement of suggestions for your document. And if you choose to customize your settings for that tool, you’ll be directed to this same spot. So, be sure to take a look at our how-to for help using Microsoft Editor in Word.
On Mac, you have some extra options in the Require section on the main Grammar Settings screen. On Windows, these appear in the list of options in the Punctuation Conventions section.
Punctuation Required With Quotes: You can choose Don’t check, Inside, or Outside.Space Between Sentences: You can choose Don’t check, One space, or Two spaces.
When you finish making your adjustments, click OK and then OK once more in the Word Options window. And if you make any changes that you want to undo, click Reset All to revert to Word’s default settings.
Take the Time to Adjust Your Word Grammar Settings
Making adjustments to the default grammar settings in Word is worth your time. You can stop hitting Ignore for the same things over and over. Plus, you can have Word check for the things that mean the most to you. For more, please take a look at our Microsoft Word tips for creative writers. And to keep up with our new how-tos, follow us on Twitter. Comment Name * Email *
Δ Save my name and email and send me emails as new comments are made to this post.


![]()
