DCCW.exe for Windows 10
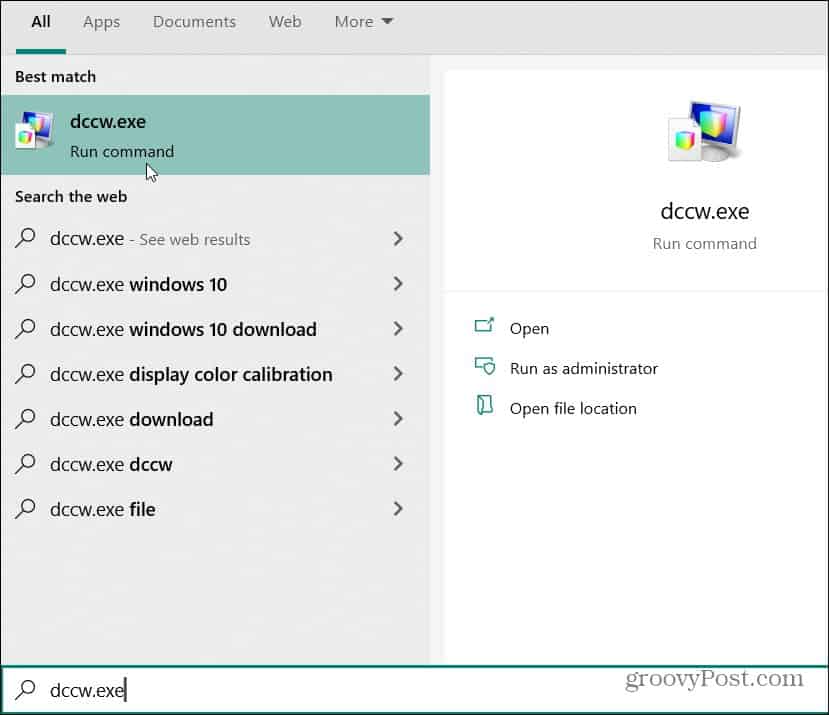
Hit the Windows key on your keyboard and type: dccw.exe and select the result from the top.
If you’ve just purchased a new LCD screen and the color seems off, there’s a good chance the fault lies within Windows 7 and not your hardware. When borrowing a friend’s laptop, the first thing I noticed was that the Aero theme didn’t quite look right. At first, I thought it was a fried video card, but it turns out it was just a messed-up gamma setting. Using Windows 7 built-in Display Color Calibration tool you can easily adjust the appearance of your screen accurately and perhaps improve how things look. Wanna try it out?
How To Fix Color, Brightness, and Contrast Issues on Windows 7
Click the Start Menu Orb and then Type in dccw.exe and Press Enter.
Welcome to the welcome screen! Click Next.
Use the external or functional keys on your hardware display to change it’s setting to a default factory state. Then Click Next.
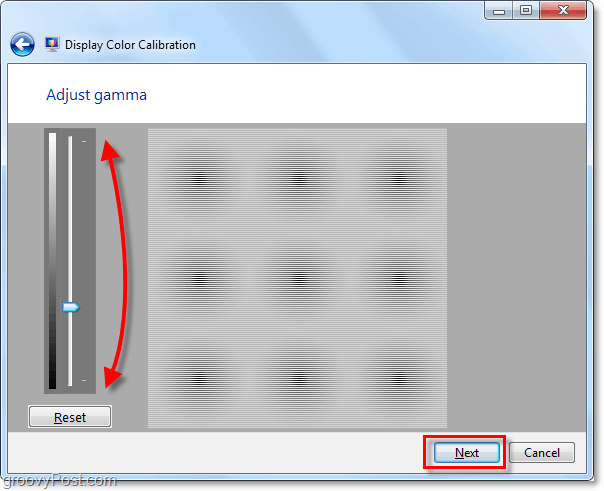
Take a look at the image titled Good Gamma.; You will want to memorize how this looks so that you can try to replicate it on the next page. Click Next.
Using the adjustable slider on the left, Adjust the gamma to match the Good Gamma image from the previous page. Click Next once you’ve felt you matched it. Note: Exactly matching the example image can prove impossible, so just try to get it as close as you can.
On the next page you can use this tool to help you adjust the external or functional contrast and brightness settings of the display. This Microsoft tool isn’t necessary to properly adjust your hardware settings, so for this how-to we’ll Click Skip brightness and contrast adjustment.
You’ll end up at the color balance example page. Try to memorize what the large Neutral grays sample looks like, as on the next page we’re going to try to replicate it. Click Next.
Use the 3 color sliders to Adjust the color balance of your screen, try to make the grey bars look like neutral grays as shown on the previous page. Once you think you’ve got it right, Click Next.
On the final page of the color calibration tool, you will be able to compare your current settings to your old ones. Click Previous calibration and compare it with your Current calibration to see which you like better. Chances are, your new calibration should look better than your old config and if that’s the case, your all done! Click Finish. BUT, if for some reason you find you like your previous calibration better, Click Cancel.
Summing Up
That’s all there is to it! If things still don’t look quite right feel free to run through the wizard a few more times and adjust all of your hardware settings along with it. If you’re having a serious hardware problem with your display, then the wizard will only be able to help to some degree. It might just be time to buy a new screen or video card. Comment Name * Email *
Δ Save my name and email and send me emails as new comments are made to this post.


![]()
