Instead of remembering to type in an IP address like 74.125.131.106 for Google, you can type in google.com, for example. DNS functionality is usually provided by your internet service provider, but these ISP-provided servers can prove to be slow and unusable. Slow DNS, slow internet browsing—changing your DNS settings to a different service can provide a faster and more secure browsing experience than your ISP can provide. If you want to change DNS on Windows 11, here’s what you’ll need to do.
Free DNS Services and Settings
Here is a look at three popular DNS alternatives that can provide a faster browsing experience and better security. Services like OpenDNS (now owned by Cisco) have extra perks, like web content filtering and phishing website blocking, that your ISP may not offer. If you need a free DNS provider, here are some IPv4 options for you to try:
OpenDNS: 208.67.222.222 and 208.67.220.220Cloudflare DNS: 1.1.1.1 and 1.0.0.1Google Public DNS: 8.8.8.8 and 8.8.4.4
Depending on your location and ISP, using an alternate DNS can result in pages loading faster. You might want to try out each one to find which one works best for you, however.
How to Change DNS in Windows 11
There are a couple of different ways you can change DNS settings on Windows 11. You can do this via the Settings app or by using the classic Control Panel settings menu.
Change DNS via Settings
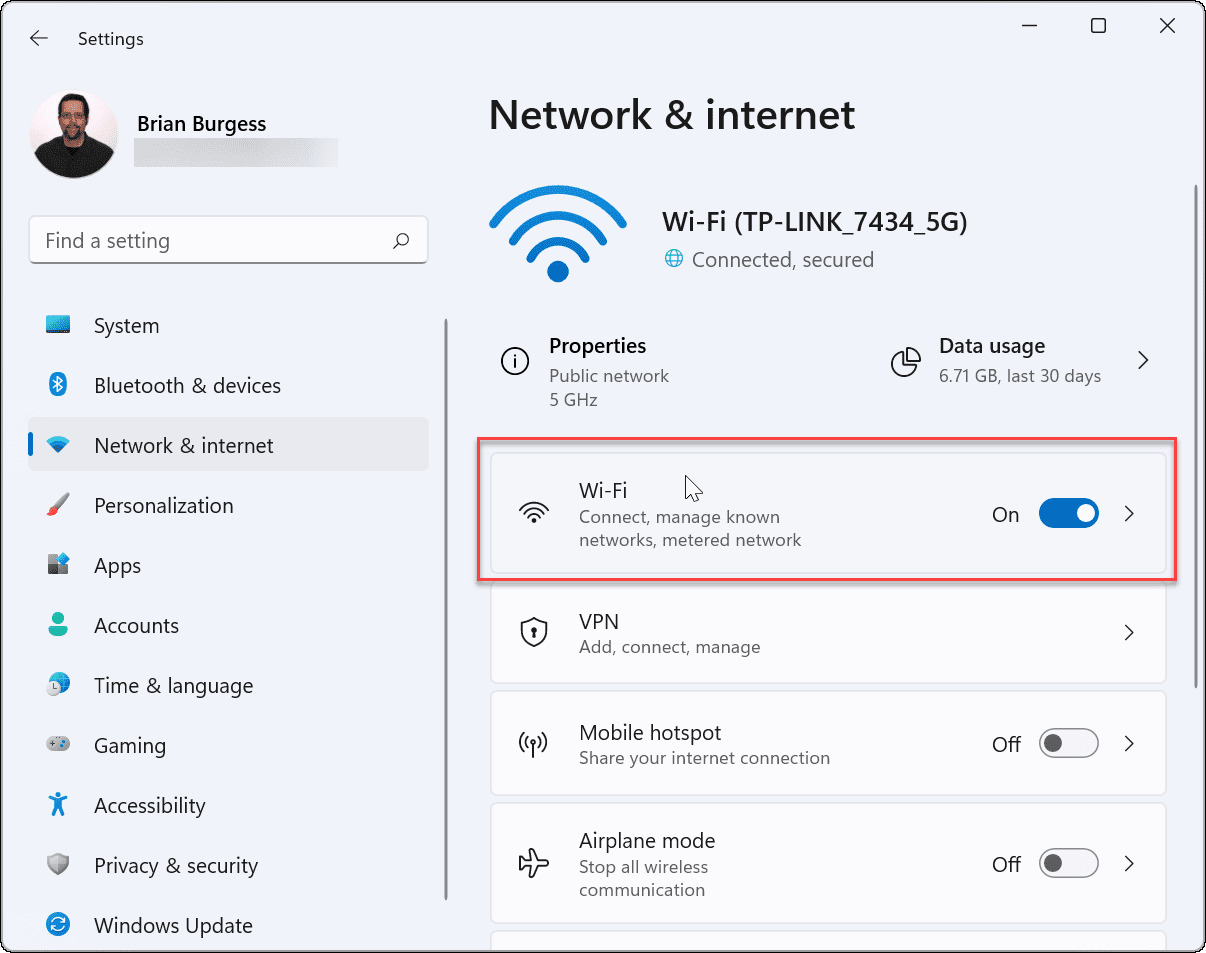
If you want to change DNS settings using the Settings app, open Start and select Settings. In the Settings menu, select Network & Internet on the left. Next, select your connection type on the right—either Wi-Fi or Ethernet.
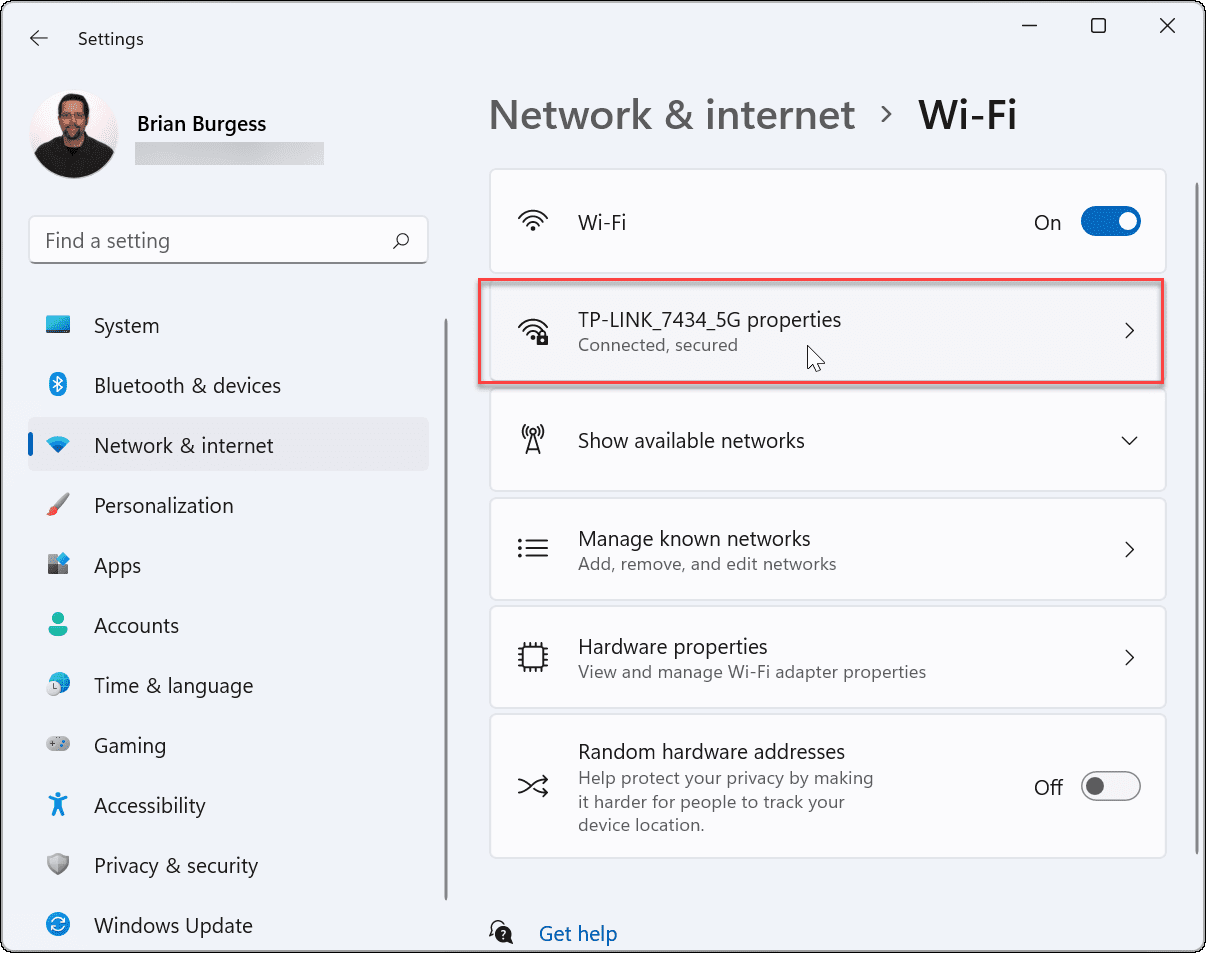
Next, click the properties option for your active network connection. For example, for Wi-Fi connections, your wireless network will be listed by name here.
In the next menu, scroll down and find DNS Server Assignment—it should be set to ‘Automatic’ if you haven’t changed your DNS settings before. To make changes, click the Edit button.
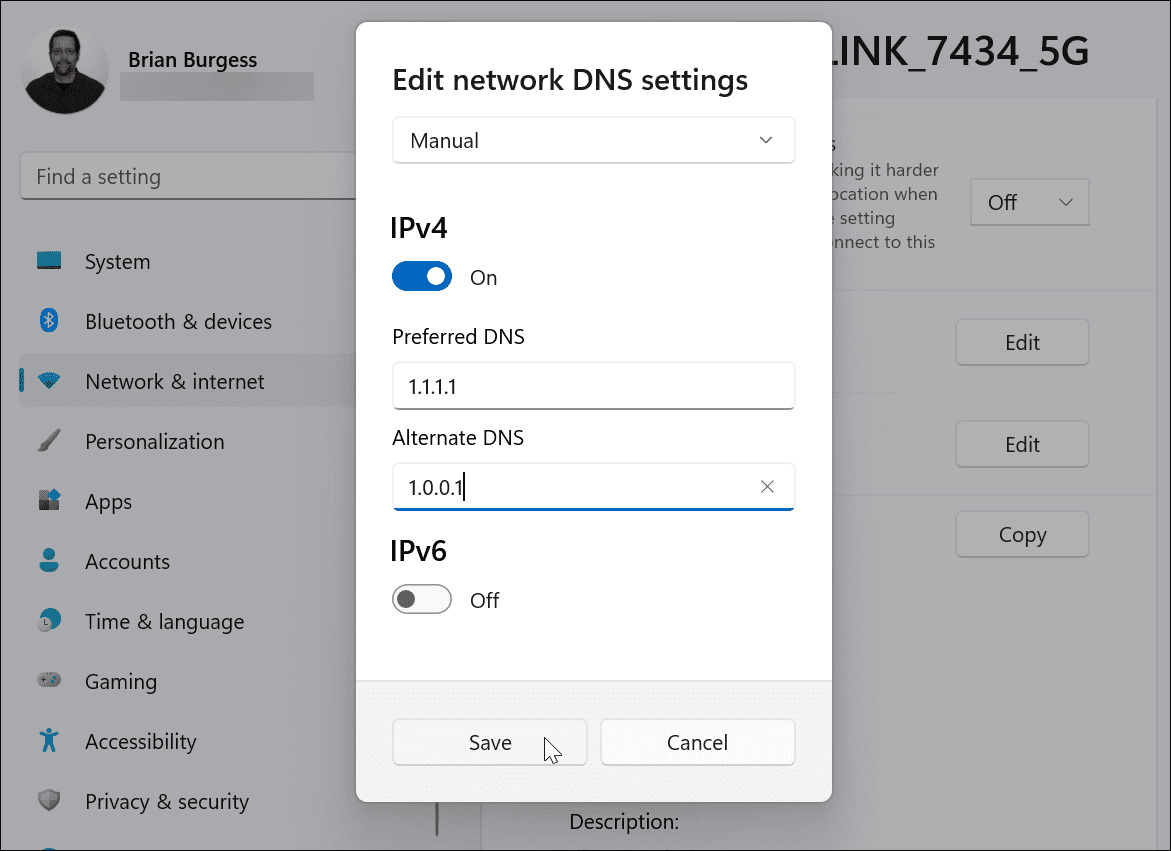
Select Manual from the dropdown menu when the “Edit network DNS settings” dialog comes up.
Next, turn on IPv4 and type in the preferred and alternate DNS provider’s details. For example, to use Google’s public DNS, type 8.8.8.8 and 8.8.4.4 here. Make sure to click the Save button for the changes to go into effect. In the example below, I’m using Cloudflare DNS, but you can use a DNS provider that works best for you.
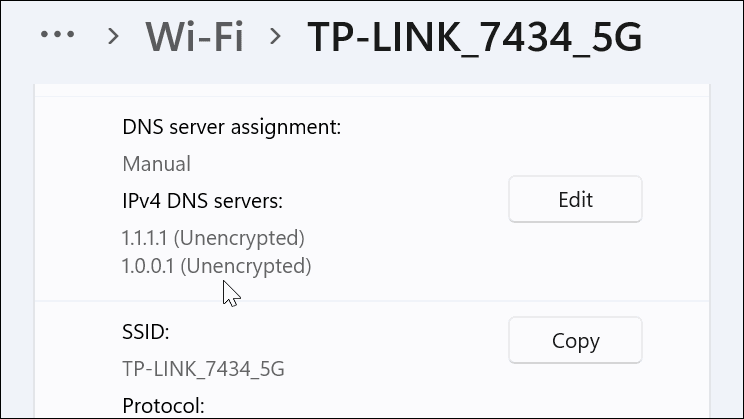
After saving your settings, you’ll find them listed in the “DNS Server Assignment” properties.
Change DNS Settings on Windows 11 via Control Panel
You can still use the older Control Panel to change DNS settings on Windows 11 if it’s more comfortable for you. To do this, open Control Panel (via Start—type control panel and select it via the Best match option) and select Network and Sharing Center > Change Adapter Settings. Tip: To get there quicker, hit the Windows key, type network connections, then click View network connections from the top Best match result.
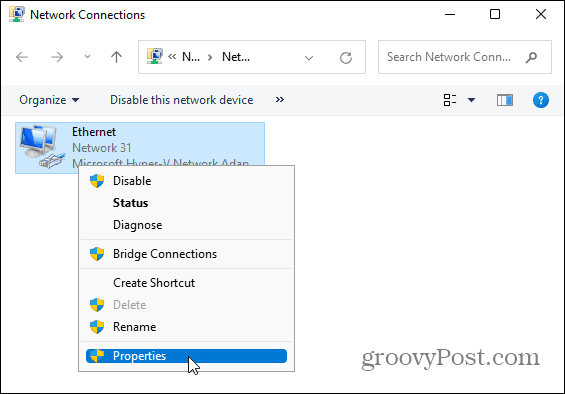
The Network Connection screen opens to your existing connections—either Wi-Fi or Ethernet. Right-click the adapter you wish to configure, then click Properties. Click Yes if the UAC dialog displays a message.
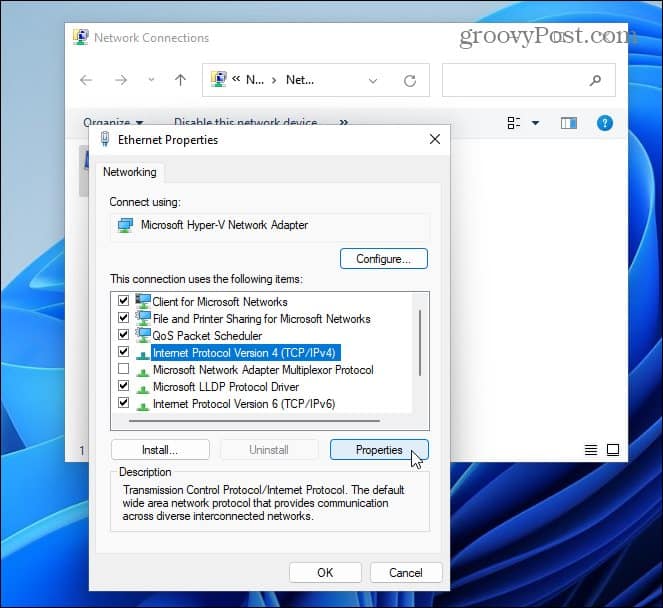
In the network adapter properties window, highlight Internet Protocol Version 4 (TCP/IPv4), then click the Properties button.
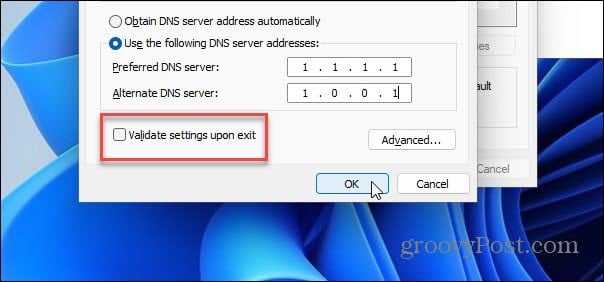
Next, select the “Use the following DNS server addresses” option and type in the IP addresses for the DNS service you want to use, then click OK. To verify the settings work, check the box to Validate settings upon exit. Close the remaining windows afterward.
Verify DNS Settings
A network troubleshooter will start if you check the “Validate settings upon exit” box using the Control Panel method. You’re good to go if it doesn’t identify any problems. If it finds an issue, go back and make sure you entered the DNS settings correctly.
You can also check your DNS settings are working via the Command Prompt or PowerShell. Launch either utility via Start (type cmd or ps, then select the first option), then type ipconfig /all. Scroll down to your network adapter properties afterward–you should see the DNS servers being used.
Of course, you can try the old-fashioned way, too. Open your browser and try to visit a site you don’t normally visit—if it loads, your custom DNS server should be working.
Configuring DNS Settings on Windows 11
If you notice pages are loading too slowly while you browse the web, you might want to change DNS settings on Windows 11 using the steps above. Not only can it speed up your browsing experience, but services like OpenDNS can provide additional features to help you stay safe online. You could also think about using alternate DNS settings on your Wi-Fi router. This will provide the same benefits to all devices connected to your network, and you won’t need to configure each device individually. It’s also worth mentioning that you should test out different DNS services to find the one that works best. You might find that the DNS provided by your ISP works fine—if it does, you may not see any benefits to switching servers. If you haven’t upgraded to Windows 11 yet, you can change DNS settings on Windows 10 just as easily. Did you know you can also set up a metered connection in Windows 11? It’s a critical step in limiting data use on Windows 11, especially on mobile or capped connections. Comment Name * Email *
Δ Save my name and email and send me emails as new comments are made to this post.


![]()
