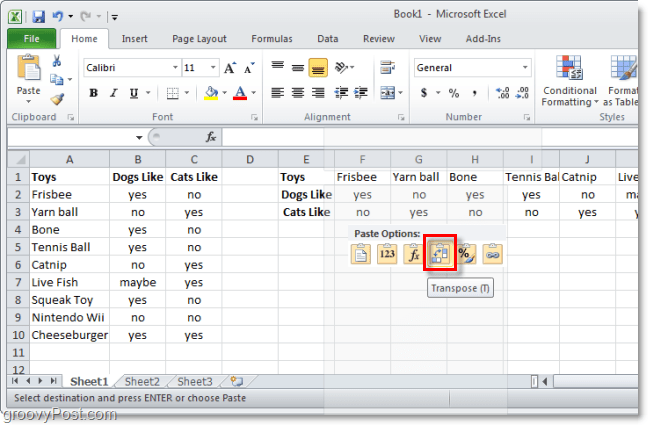
Here we have a typical spreadsheet in Excel 2010 that is lined up vertically using a column style. Just for demonstration sake, we’re going to go ahead and change this into a horizontal row style.
- In Excel 2010, Select all of the cells that you want to convert. Once you’ve Selected them, Right-Click and Click Copy.* *You can also use the keyboard shortcut Ctrl+C to copy.
2. Now Right-Click and empty cell and Select Paste Options: > Transpose. One of the groovy features in Outlook 2010 is that it will even show you a preview of what the paste will look like before it happens.
2.b Alternatively if the Paste Options aren’t showing up. Right-Click an empty cell and Select Paste Special.
3. From the Paste Special window Check the Transpose box and then Click OK.
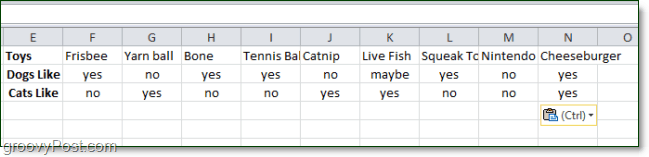
The result will be that your data has been converted (transposed) to a new layout style. This tip will work the opposite way as well if you ever need to convert your horizontal row data sheets into the vertical column style.
Have you tried out Excel 2013 yet? What do you think of it so far? Very nice feature, I am using this from 2010. Easy me to use in 2013. Thanks, Any ideas? Comment Name * Email *
Δ Save my name and email and send me emails as new comments are made to this post.


![]()
