In this guide, we’ll assume that you already have CCleaner installed on your PC. CCleaner is a free system tuning utility made by Piriform if you don’t have it –you should go get it! Few programs out there will give your PC the occasional (or daily) cleaning that it needs as CCleaner does.
The Recycle Bin method
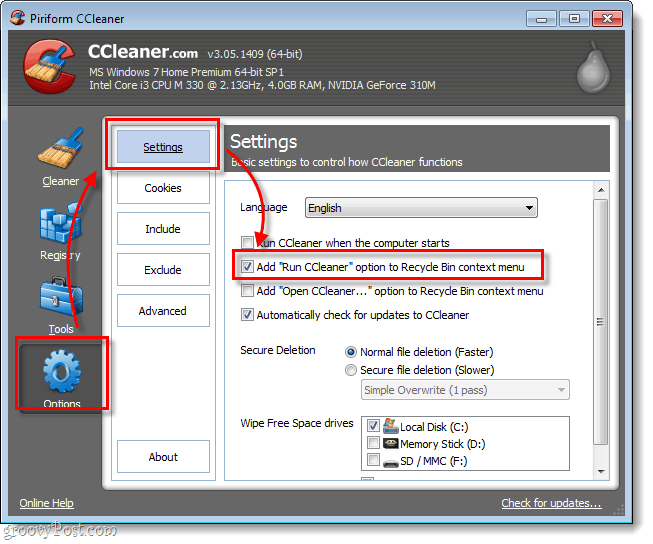
By default, CCleaner should install and add a “Run CCleaner” context menu option to the Recycle Bin icon on your desktop. If you opted out of this during installation, you can still add it in CCleaner at: Options > Settings > Add “Run CCleaner” option to Recycle Bin context menu.
With this enabled, just Right-Click the Recycle Bin and Select Run CCleaner.
The Keyboard and Shortcut Icon Method
If the Recycle Bin isn’t your bag (some people even hide it from sight), or you just prefer to use a dedicated button/keyboard hotkey, we’ve got you covered with the instructions to do both below.
Step 1
First, make sure your settings are the way you want them. Click the Cleaner tab in the program and check the items that you want CCleaner to delete duChrome and Firefox are listed under Applications.ring its wipe process. Don’t forget, there is both a Windows and Applications list to choose from;
Step 2
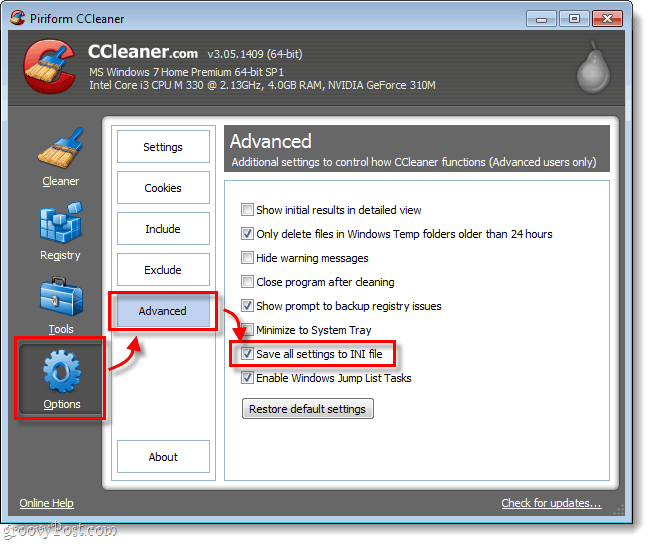
Next, let’s make sure our settings are backed up. Select Options > Advanced and Check the box labeled Save all settings to INI file.
Step 3
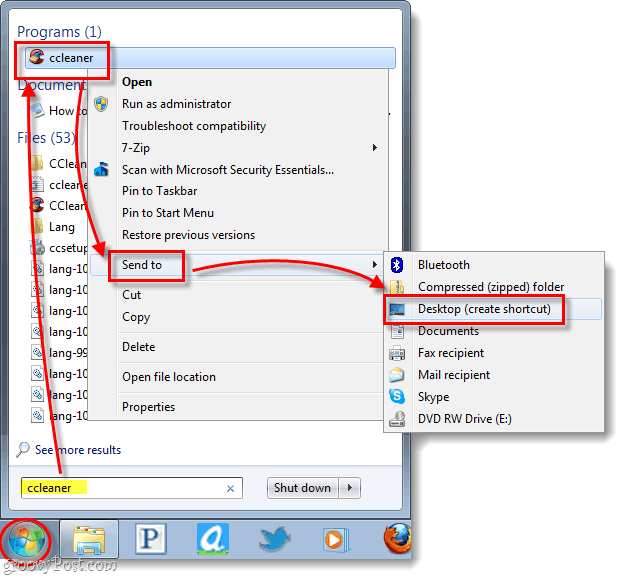
Now we need to create a new shortcut so that we can make our fancy History-erasing panic button. There are a few different ways to do this, but I find this method the easiest: Click the Start Menu Orb, Type CCleaner in the search box. From the Programs list, Right-Click CCleaner then Select Send to > Desktop (create shortcut).
Bam, shortcut is made and it is on the desktop. That was simple eh?
Step 4
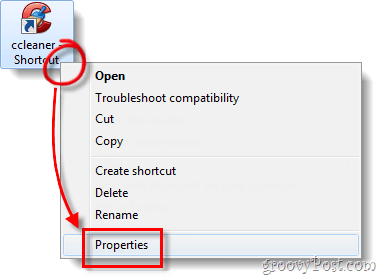
Now that the shortcut is made, we need to modify it. Right-click the shortcut and select Properties.
Step 5
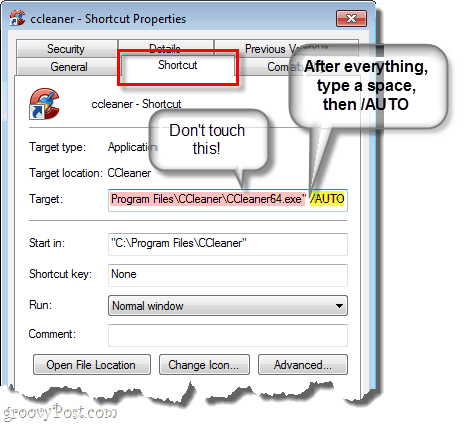
The properties window should automatically load to the Shortcut tab. Now we need to adjust the Target. All you have to do, is go to the very end of the text in the Target box and add /AUTO to it.* For example, mine now says: “C:\Program Files\CCleaner\CCleaner64.exe” /AUTO *The /AUTO switch makes CCleaner run silently.
Step 6
Lastly, add a hotkey-shortcut. Click the Shortcut key box and then Press a combination of keys that you’d like to make the program run automatically. In the example below i used Ctrl + Shift + Alt + P (P for panic).
Done!
Now you have a CCleaner panic clean-up button on your desktop, and on your keyboard! If you don’t want the shortcut to show up on the desktop you can mark it as a hidden file or create it in the Start Menu instead. One thing to note is that if you have the UAC enabled, you’ll see a prompt whenever clearing you press the button. Comment Name * Email *
Δ Save my name and email and send me emails as new comments are made to this post.


![]()
