You can get ahead of the game by creating filters from scratch. Then when the emails start pouring in, they’ll go to a folder, be marked, or get labeled, making it easier to manage your inbox.
Access Gmail Filters in the Settings
To set up a filter, open your Gmail settings. Click the gear icon on the top right and select See all settings in the sidebar. Choose the Filters and Blocked Addresses tab and click Create a new filter.
Once you create your first filter, you can return to this spot in your settings to review or edit your filters anytime.
Create a Gmail Filter
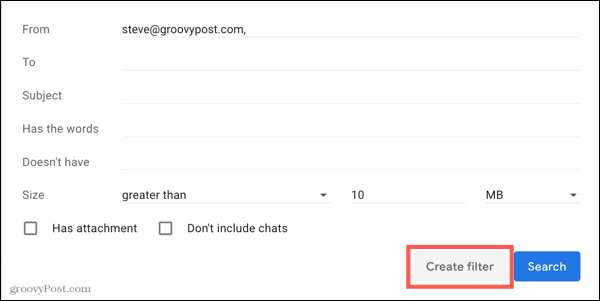
The filter creation tool is attached to the Search box. This allows you to apply the filter you create to emails currently in your inbox and new ones that arrive. You can base a filter on who an email is from, who it’s to, what’s in the subject, what’s in or not in the body if it has an attachment or its size.
You can also use a combination of these conditions. This allows you to create filters for things like large emails from your boss, messages for shopping deals from stores you subscribe to, or emails from your friend that contain attachments. Fill out the criteria you want to use, whether one or more, and click Create filter.
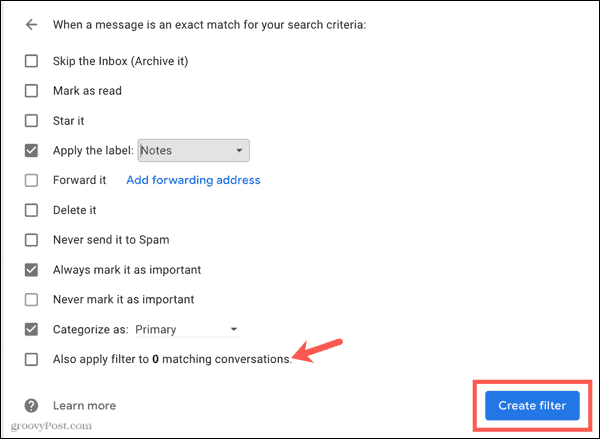
Next, choose what you want to do with emails that meet your conditions. You have 10 different options like mark it as read, apply a label, delete it, mark it as important, and categorize it.
Here again, you can select more than one action. So you can mark an email as “read” and apply a label, star and forward it, or archive and categorize it. Select the actions you want to apply. Then at the bottom of the list, check the box to Also apply filter to X matching conversations if you want to perform the actions to matching emails already in your inbox, if any. Click Create Filter.
Your filter is then ready to go and do exactly as you want with emails that arrive matching your conditions.
Edit or Delete a Filter
To make changes to a filter, you create or remove one, go back to See all settings > Filters and Blocked Addresses. Then click Edit or Delete on the right side of the filter per your preference.
Save Time and Energy With Filters in Gmail
By setting up filters, you can automatically take action on emails you receive. The upfront time you spend creating filters saves you time in the long run and keeps your inbox more manageable. For additional ways to manage emails in Gmail, look at how to set up multiple inboxes or create and use Gmail templates. Comment Name * Email *
Δ Save my name and email and send me emails as new comments are made to this post.


![]()
