Partition Windows 7 Hard Drive
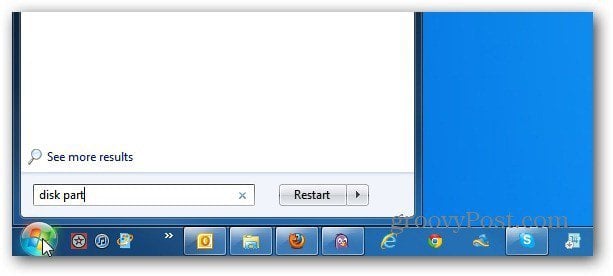
First, click Start and type: disk part into the Search box and hit Enter.
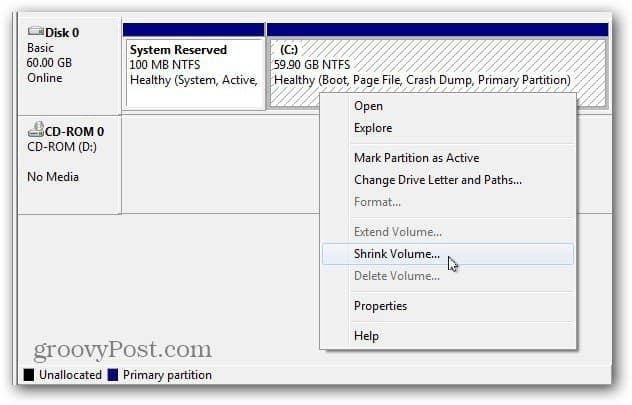
The Disk Management utility comes up. Here you’ll see the drives and partitions currently on your computer. Right-click the C:\ drive and select Shrink Volume.
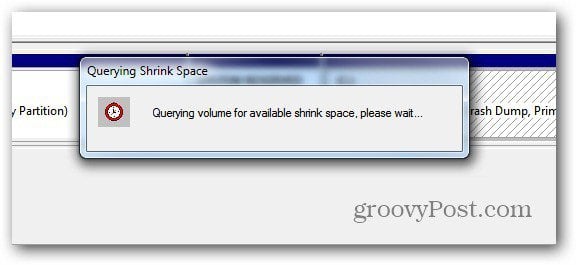
Windows will query the drive to find available space to shrink.
Now select the amount of space to shrink the C:\ drive by. If you’re installing the 64-bit version of Windows 8, you need a minimum of 20GB. For the 32-bit version, you need a minimum of 16GB. Remember the amount you shrink is displayed as MB so you need 21000MB for 21GB for example.
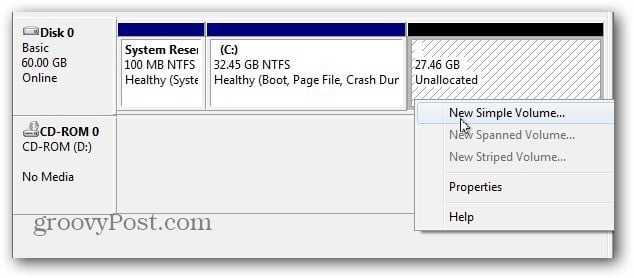
After the process completes, you’ll have your second partition labeled as Unallocated space. Right-click on it and select New Simple Volume.
The New Simple Volume Wizard comes up. The process is straightforward but there are two things to point out when navigating through the wizard. First, give it a Drive Letter – here I’m giving the drive letter F:\ but you can give it any available letter you want.
Next, make sure to set the formatting to NTFS – which is by default. Also, give it an easy to remember Volume Labels such as Win8 or Windows8. This will make it easier to identify as you continue.
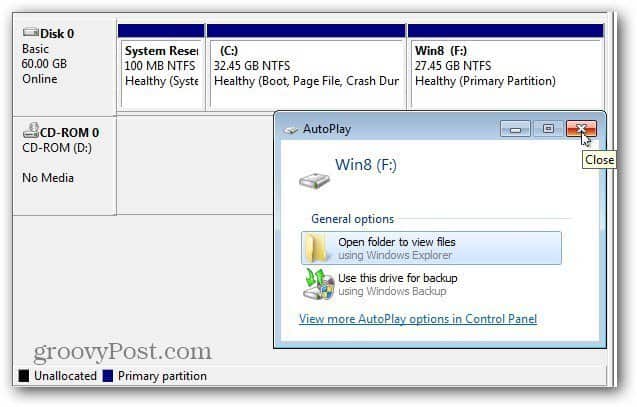
Finish the wizard and Windows will partition the new volume. Success! Windows created the new drive partition and recognize it as a new drive so AutoPlay comes up – just close out of it.
Install Windows 8 on New Partition
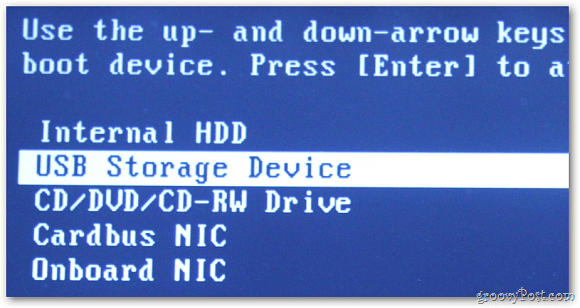
Now it’s time to install Windows 8 on the new partition. You’ll need a bootable ISO image of Windows 8 on either a DVD or USB Flash Drive. Create your bootable media and restart your machine. During the initial boot stage, change the boot device order to a USB drive or DVD.
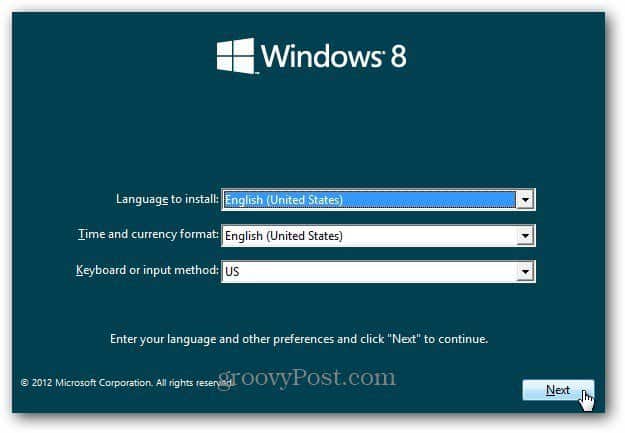
Now you can go through the process of installing Windows 8 on the new partition you created. Work through the first steps of the Install Wizard. When you get to the Install Type screen, select Custom. You’re not upgrading Windows 7, you want to install Windows 8 on the new partition.
Next, select the new partition you created. This is why it’s a good idea to give the new partition a Volume Label of Win8.
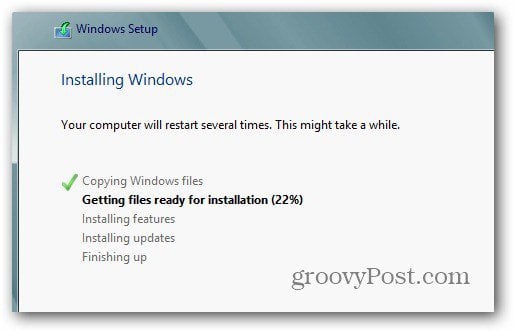
Now, wait while Windows 8 installs on the new partition.
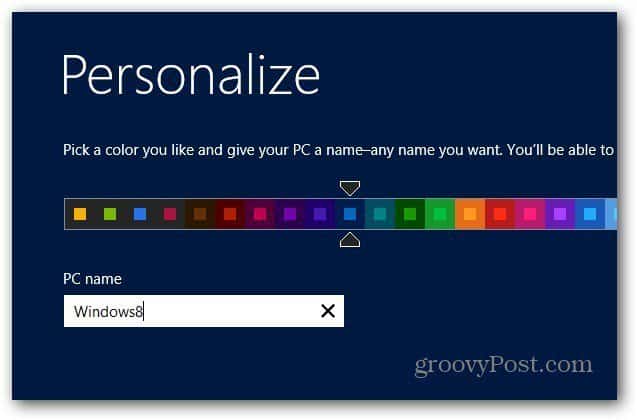
After a couple of reboots, go through the setup process of Windows 8.
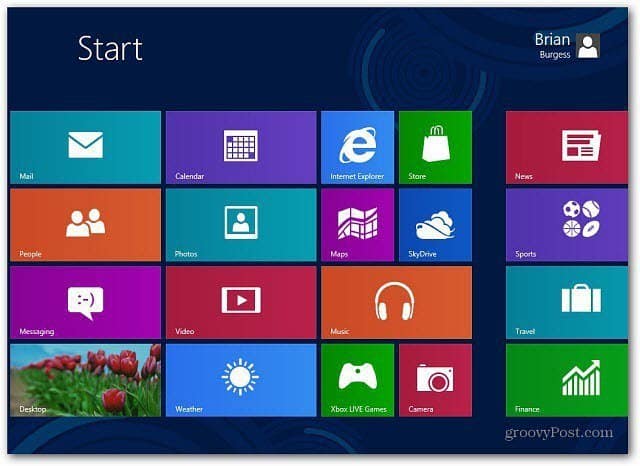
After you’ve completed the Windows 8 setup, you’ll have a fresh copy of Windows 8 on one partition and Windows 7 still on the other.
Configure Boot Options
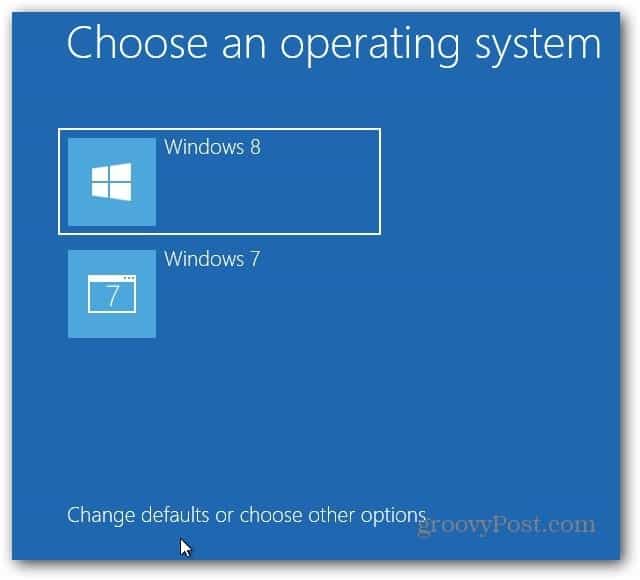
Congratulations, you now have a dual boot system! When you power on your computer, you’ll see the following screen which lets you choose between booting into Windows 7 or Windows 8. By default, Windows 8 will be what it defaults to. You can change this behavior by clicking on Change Defaults or Choose Other Options.
Here you’ll find three different options.
Change the Timer – Change how long you get to select an OS to boot from. You can select from five seconds to five minutes.Choose a Default Operating System – Choose whether Windows 7 or Windows 8 boots as the default.Choose Other Options – This lets you select between more options like doing a PC Refresh or Reset, Select a different OS and other troubleshooting options.
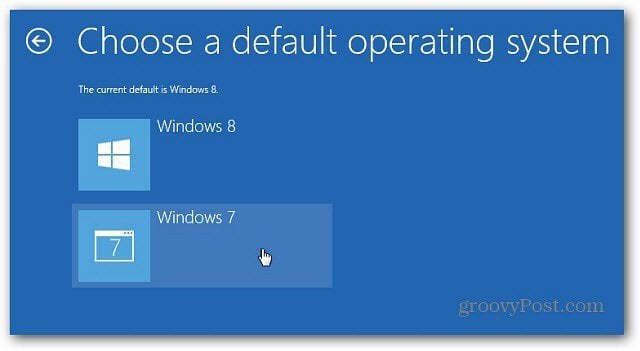
Your system will boot into Windows 8 by default. When you go into Boot Options, select Chose a Default Operating System, then click on Windows 7.
After changing the default OS to Windows 7, now when you start up your computer, it will show you the traditional Windows Boot Manager.
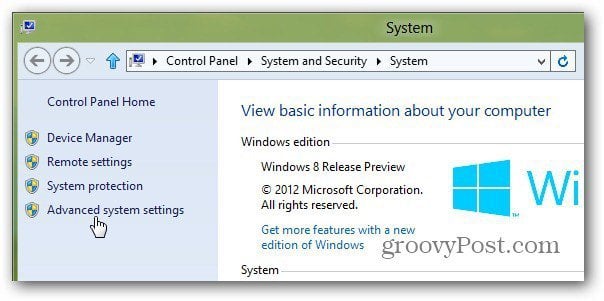
You can change the default operating system in Windows 8 too. From the Metro Start screen, use the keyboard shortcut Win Key + W to pull up Settings Search and type: system into the Search box. Then click the System icon under the search results.
Control Panel opens up on the desktop. Click Advanced System Settings.
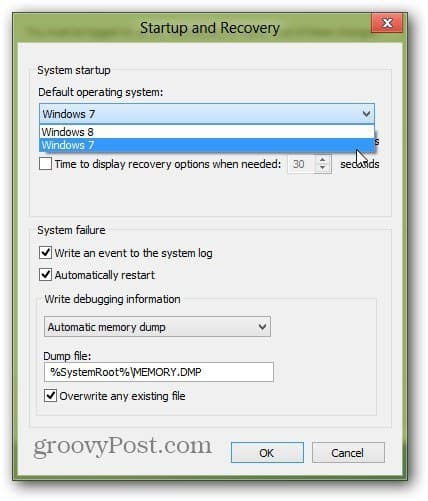
The Advanced Tab opens in the System Properties window. Click the Settings under Startup and Recovery.
Now under Default Operating System select the one you want it to boot into and click OK.
You don’t need to just dual boot Windows 8 with Windows 7 either, you can dual boot with XP or Vista or a Linux distribution. There you have it. Enjoy your new dual boot system. https://www.groovypost.com/howto/can-my-windows-8-pc-run-hyper-v-slat/ Have fun with that one. ;) Comment Name * Email *
Δ Save my name and email and send me emails as new comments are made to this post.


![]()
