Update: Windows Live Movie Maker is no longer supported. And it is no longer available for download for Windows 10. But if you happen to still have it installed on your system these instructions will still work.
Are you having trouble with .mov files? Some new Canon cameras and also the iPhone 4 record video in .mov format. Sadly I know firsthand how frustrating it can be to find a simple method for streaming these MOV files to an XBOX 360 from Windows 7. Fortunately, this story had a happy ending once I found a simple method for converting .MOV files to .WMV format using Windows Live Movie Maker.
Step 1 – Confirm the file format your converting
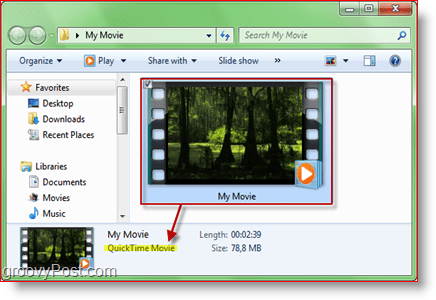
Make sure the movie you are trying to convert is a .mov file. Granted this process will work for any MOVIE/VIDEO format that’s recognized by Windows Movie Maker but for this tutorial, I’ll be using .MOV. First, let’s confirm were dealing with a .MOV file. Open up Explorer and navigate to the directory of your movie. Left-click the file to select it and look in the bottom info pane. Right below the filename of your clip, there should be some gray text saying “QuickTime Movie” (see screenshot below.) If this is correct, then we can move along.
Step 2 – Launch Windows Live Movie Maker
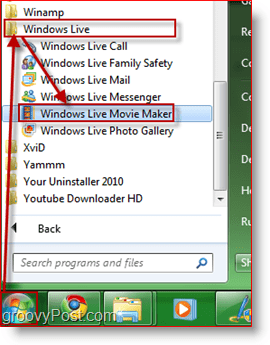
Since Windows 7, Windows Live Movie Maker comes bundled into Windows Live Essentials. Most likely it’s already installed, but if it isn’t, you can grab a free download here or if you feel brave, you can get the latest beta here. Before you grab the beta you might want to read about it in a review we did a week ago. One thing to keep in mind, the screenshots below use the latest stable version of Movie Maker, not the beta. If you already have Windows Live Movie Maker or you just installed it, simply go to Start > All Programs > Windows Live > Windows Live Movie Maker.
Step 3 – Import your video into Windows Live Movie Maker
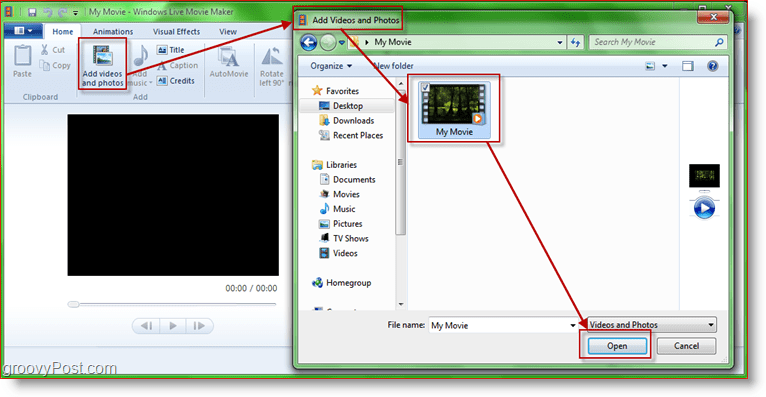
On the Home tab click Add Videos and Photos. A browser-like dialog box will appear. From there, browse to your video, select it and click Open.
Step 4 – Test the video to ensure
Now let’s see if Movie Maker has correctly opened the file. Try seeking and playing the video. Notice the seeker on the right side too.
Step 5 – Export/Convert movie to .WMV format
Click the “More Options” arrow in the Sharing section of the “Home” tab. Now you’ll have a few different choices. I’d recommend using one of the first options in “Other Settings To Save A Movie On Your Computer.” The first three from left to right are: HD 720p, HQ 480p and Standard-definition (circled in green in the screenshot below.) In this case, I’ll be using HD 720p because the .mov file I’m using is in high definition and I’d like to keep that quality.
Step 6 – Choose where you want to save .WMV file
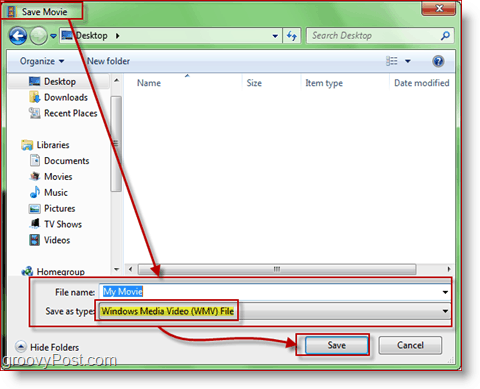
When saving the movie, use any filename you want but make sure you don’t change anything in the “Save as Type” droplist. You need it to say Windows Media Video (WMV) File.
Step 7 – Conversion process should now begin
Now it’s time to wait. A groovy little window will appear showing the progress of the operation
That’s it! The conversation/saving process time will vary depending on the size of the movie, quality you chose for the WMV and the speed of your computer. However, when it’s finished, you should have a brand new EASY TO STREAM .WMV file ready to stream to your XBOX! When saving my HD .MOV files to 1080p I’ve found that little to no quality gets lost, unlike other more geeky solutions I discovered out there. How did the process work for you? Do you have a preferred transcoding process or product you like to use? Drop a note in the comments! Editor Update: A reader recently asked about converting a .MOV to .MP4. If you have a similar question, please be sure to drop it in the comments, and I will try to help you with the transcoding process in short order. Here’s a good link for other tools but I have to admit – this is clever and SIMPLE. Nice groovydudes. http://is.gd/drjfg – It’s a bit old but it’s another list. I had a problem with a Powerpoint 2010 presentation cutting 10 crucial seconds off a Quicktime video taken from an iPhone. I caught a tip to try converting the video to .WMV as Powerpoint seems to work through that format better. I found your forum, did what you said, re-embedded the video in its new .WMV form and the presentation looks great. Thanks again! If I try this in Movie Maker, mov files are ignored (not shown on the list of compatible files) and I cannot import them. Neither can I drag and drop. If I try to force it by asking for . all files, it shows it but then rejects the file. Nick Odd – perhaps if you install the free quicktime from Apple it will give you the right codex to play it…? No, I have QT installed. No go. You might have the right track though, as I think I had it working on another PC. Nick It’s a free transcoding package that allows you to convert almost anything to anything ;) It’s really amazing software. Found similar result with “Prism Video File Converter Plus” Do you know a way to rotate the film clockwise? Seems like I held my Iphone wrong when using the videocam…!! Thanks! At first this did not work on my Windows Live Movie Maker wich runs on Windows Vista, but reading your post gave me the will to try on my notebook with Windows 7 and it works great!! Mostly because Windows 7 already comes with a native h.264 codec. Now I can be the professional dvd maker from the iPhone fun home videos our friends makes =D Cheers!! Thnx for the info and the story. -Steve -Steve Thanks! -S Thanks for the comments. I wrote this tutorial back in 2010 and that was probably…. 2 or 3 versions ago so a few things might have changed. Microsoft just released Windows Movie Maker 2012 a few days/week ago. I’ll play with the latest version and update the article accordingly. Unfortunately, I don’t have Windows Vista installed any longer so I’ll only be testing with Windows Vista. Granted, that shouldn’t matter (you would think) but who knows.?.?. Stay tuned. -S For people with advanced cameras like Canons and Nikons that record in HD, these videos will not be able to be imported into Windows Movie Maker 2.6. However, Windows Live Essentials which has the Movie maker will.These are two different and separate programs. Windows Movie Maker 2.6 is for Windows Vista and does not support videos that are in the MOV format, which is the default format that Canon and Nikon videos are set in. I had this same problem of trying to import my HD videos into Windows Movie Maker 2.6 and it didn’t work. I followed the instructions above and it worked out wonderfully. So I recommend that you download the Windows Essentials from the link he provides and follow the steps. DO NOT DELETE WINDOWS MOVIE MAKER 2.6 THOUGH. Another issue I saw in the comments was how to save the video for computer: Next to the Sharing box there should be something that says “Save Movie” with a drop down arrow. Click that and you should see the “For Computer” option. After that it will take you to rest of the steps that he mentions. Now to eliminate the annoying background sound of the projector (grin). Any ideas about what can be tried to get the audio and video to convert from .mov to .wmv? Also, my version of Windows Live Movie Maker looks slightly different from your example. I wonder if my version is older or newer then the one you used? Is it possible to extract audio only from a clip, and overlay that on the muted .wmv conversion? I need a workaround if possible. Comment Name * Email *
Δ Save my name and email and send me emails as new comments are made to this post.


![]()
