By grouping spreadsheets in a workbook, you can change one sheet and have it automatically applied to the others. This is handy when you need to add a formula or format a range of cells on more than one Excel spreadsheet.
About Grouping Sheets in Excel
The most important thing to know about grouping sheets to make a change is that the sheets should be set up the same way. This is because when you edit one to apply that change to the others, it takes place in the same spot on each sheet. For example, if you add a formula to cell C10 on one of the grouped sheets, that formula will be added to cell C10 on each other sheet in the group. Depending on the type of data your workbook contains, this may be ideal. For example, you might have spreadsheets for your different salespeople, departments, classes, or something similar where each sheet is set up the same. And if this is the case for you, then you’ll likely find sheet grouping quite useful.
Select the Sheets to Create a Group
You can select the sheets you want to group in Excel in a few different ways. To select adjacent sheets, select the first sheet, hold your Shift key, and select the last sheet for the group. This is similar to how you can select a range of cells in a spreadsheet.
To select nonadjacent sheets, select the first sheet, hold your Control key (Windows) or Command key (Mac), and then click each additional sheet for the group.
To select all sheets in the workbook, right-click any spreadsheet and pick Select All Sheets.
And that’s all there is to it! First, you’ll see your group of sheets all active, meaning their tabs are white (or light if you use tab colors).
Make Your Edits to One Sheet
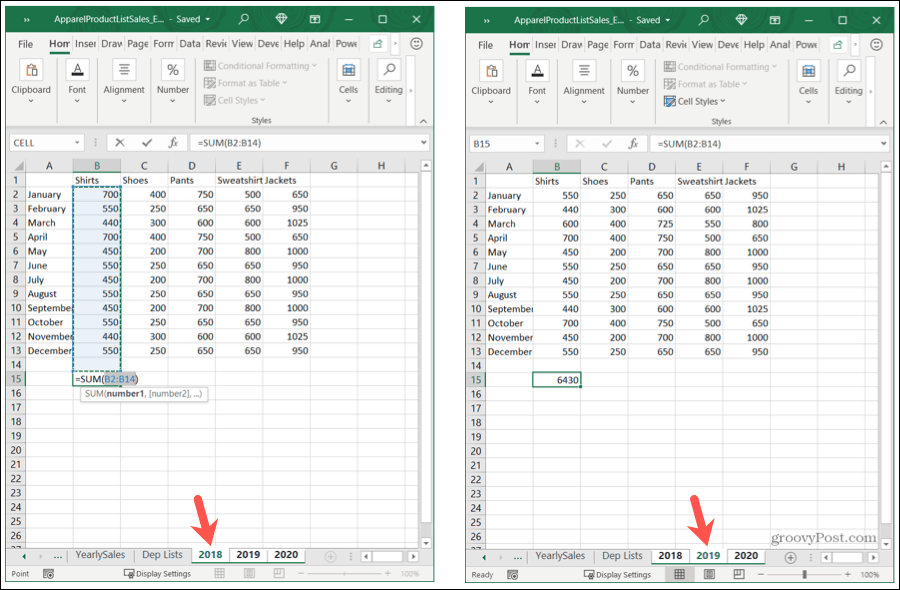
Now you can go ahead and make the change you want to one of the sheets in the group and see that it applies to the others. Here’s a simple example. We have a workbook of spreadsheets for our product sales for each year: 2018, 2019, and 2020. We want to sum the columns to see totals. First, we group the sheets using one of the methods above. Then, we make our change; we’ll use sheet 2018. We add our formula to sum the column and then check our other grouped sheets. That formula populated in those sheets in the same spot!
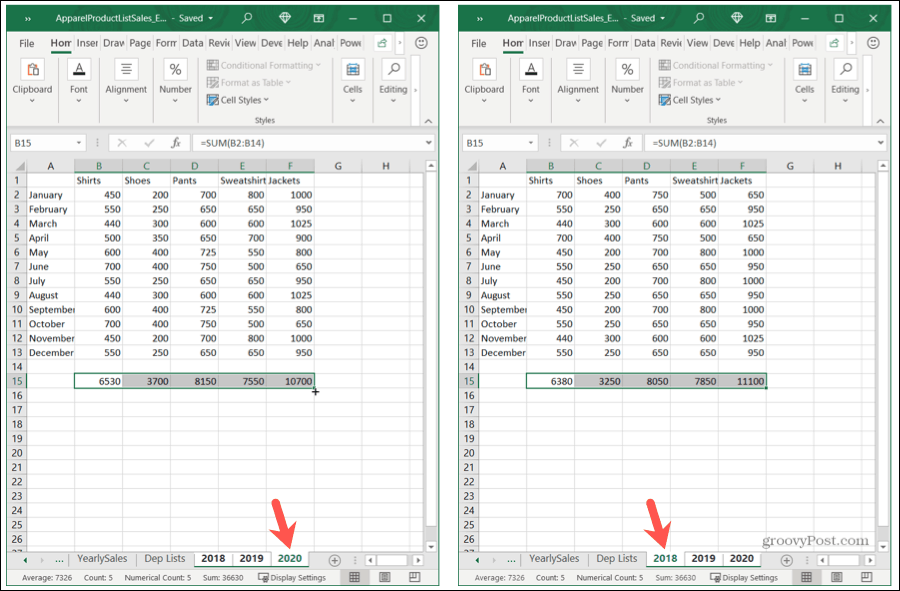
Now we copy that formula to our remaining columns on sheet 2020. And like before, that action carries over to our other sheets.
Ungroup Your Sheets
When you finish working with a group of sheets, don’t forget to ungroup them! Select any sheet in the group, right-click, and choose Ungroup Sheets.
Group Excel Sheets For Fast Changes
The next time you want to make the same changes, from formulas to formatting, across sheets in a workbook, remember to use the group sheets feature in Microsoft Excel. For related articles, check out how to group columns and rows in Excel or cross-reference between Excel sheets. Comment Name * Email *
Δ Save my name and email and send me emails as new comments are made to this post.


![]()
