How To Enable Or Disable Password Protected Sharing In Windows 7
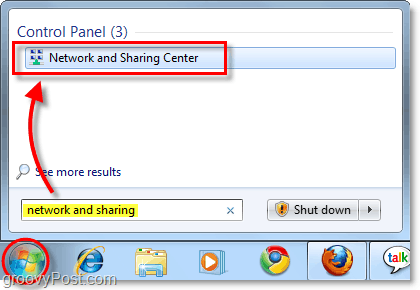
Step 1
Click the Windows Start Menu Orb and in the search box Type network and sharing. Now Press Enter or Click the Network and Sharing Center link.
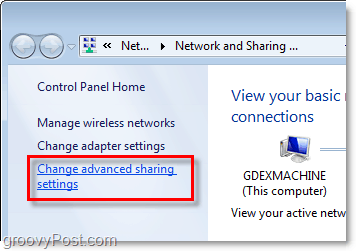
Step 2
In the Network and Sharing window Click the Change advanced sharing settings located on the left-side pane.
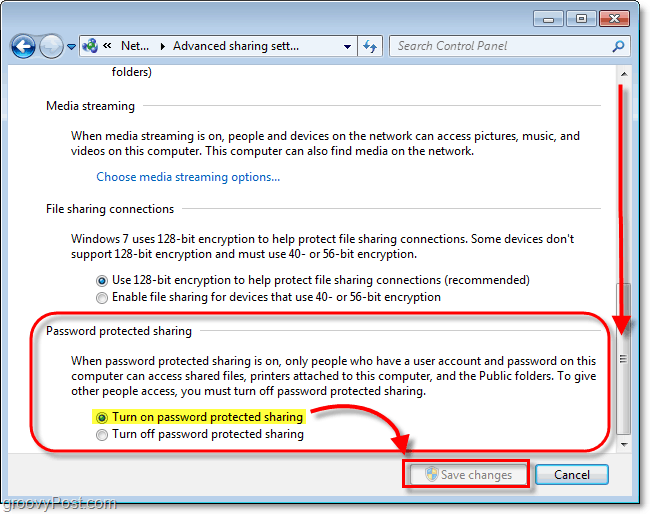
Step 3
On the Advanced sharing settings page, Scroll all the way to the bottom. Here you’ll find the section titled Password protected sharing. Click the bullet for the setting you want; there are two.
Turn on password protected sharing
or
Turn off password protected sharing
Once you’ve made your selection, be sure to Save changes.
If you’ve enabled password protected sharing, users from external computers will now be required to enter a Username and Password of an existing local user that has a user account on the computer where you’ve just enabled protection. This tip is a great technique for keeping out unwanted visitors. then choose Turn on password protected sharing or Turn off password protected sharing. Comment Name * Email *
Δ Save my name and email and send me emails as new comments are made to this post.

![]()
