Mac OS X Recovery Options
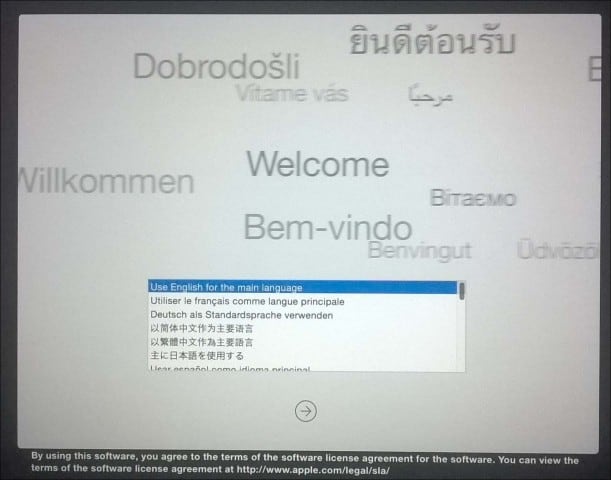
If you are unable to start your Mac successfully and not get to the login screen or even load the Finder, the first option is to turn to your recovery utilities that are built-in. To do so, shut down your Mac then start it, immediately before the Apple logo appears on screen, press Command + R keys. Exercise a little patience here as the recovery options seem to load a mini copy of OS X so it will take a little while. After loading, you will be greeted by the welcome screen below. Select your language then click Continue.
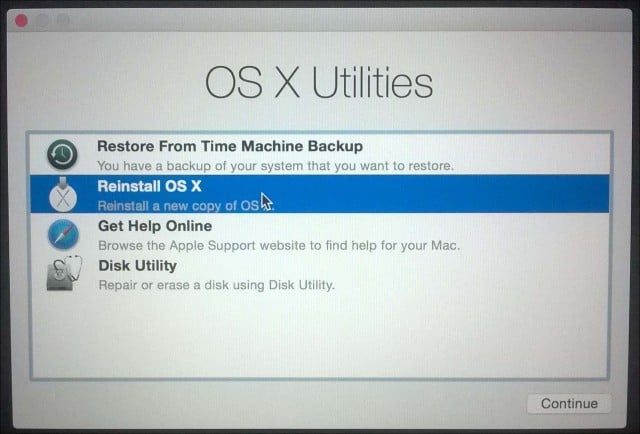
The OS X Utilities screen presents a list of typical recovery options you can try to get your Mac up and running.
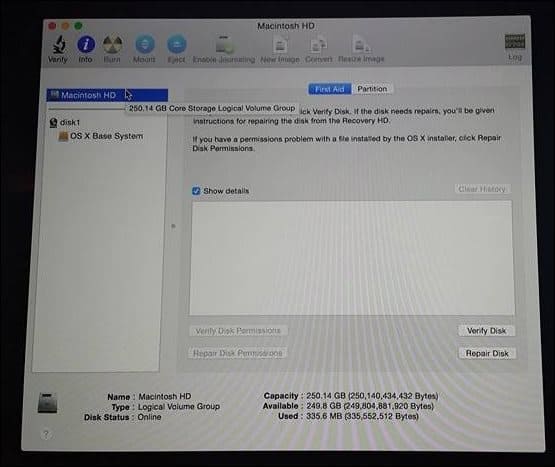
The first one I would start off with which is not too invasive is Disk Utilities. You can use this to perform basic operations such as repairing disk permissions and check the health of your system. Be careful not to click anything named partition or erase if you have data you would like recover. If you are running OS X El Capitan (10.11) or later this option no longer applies since Apple now protects file system permissions automatically. If you are running an earlier version of OS X, you can still give it a try. In the sidebar select your OS X disk click the First Aid tab click Repair Disk
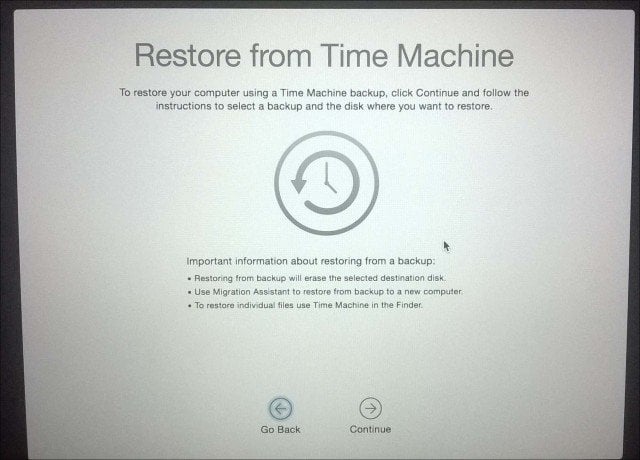
If Disk Utilities does not work, then I would look at using the OS X Reinstall option. If you are using a recent model Mac, this is dependent on having a fast Internet connection. Knowing that OS X is quite large at approximately 6 GBs, it can take some time, even on a fast Internet connection. So consider your options carefully when using this. Using Time Machine Backups As a Mac user, you might think the “it just works” philosophy might not warrant investing in backup strategies but newsflash, it does. Hopefully, you do have a backup. If you have not embarked on backing up your Mac, and you happen to come across this article, check out our comprehensive guide detailing how to implement a proper backup strategy for your Mac. If you do happen to have an up-to-date Time Machine backup, click the option in the OS X Utilities dialog and click Continue.
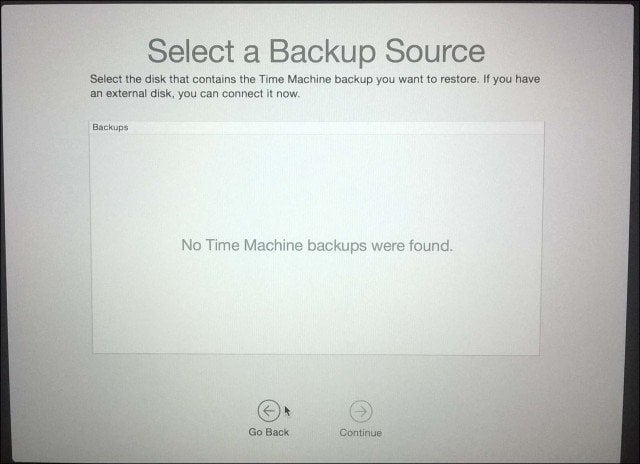
Connect your Time Machine backup and ensure it is turned on then follow the on-screen instructions. Select the most recent backup of your hard disk and click Continue. Your Mac will then restore the Time Machine backup; when complete, your Mac will restart.
Booting from your Time Machine backup is another option you have when performing a recovery. To do so, connect your external drive that contains your Time Machine backup. Hold down the Option key during the start-up sound. Your Time Machine backup drive should appear. Select the most recent backup of your hard disk and click Continue. Your Mac will then restore the Time Machine backup; when complete, you Mac will restart. If your Macs operating system is irreparably damaged and none of the above options are working or available, then Internet Recovery is the best choice. Similar to OS X Reinstall, this helps you boot directly to Apple servers where you can download and install OS X on your machine. This option is not available to all Macs but is worth a try when you have run out of options. To launch it, press Option-Command-R when booting your Mac. You will see an animated globe, wait a bit then click in the list box and select a wi-fi network to connect.
Enter the appropriate credentials and then follow the on-screen instructions to recover your Mac. Apple’s recovery options are honestly restrictive but straightforward. If you want more flexible recovery choices, take a look at some of the available third-party solutions. Our comprehensive article on backup strategies for your Mac is a great place to start. But remember, nothing beats having a good backup in the first place. With multiple Cloud Services available, setting up a few accounts at the most popular ones like Google Drive, OneDrive, Dropbox and keeping a regular backup of your personal files shouldn’t be too hard. You also need to have a secure and reliable off-site backup of your entire system. We recommend using CrashPlan, which works with Mac as well as Windows and Linux. I have to acknowledge that I have been a slow learner, trusting my Time Machine with too much and now intend to get my remaining photos into iCloud. Regards, Andy. Comment Name * Email *
Δ Save my name and email and send me emails as new comments are made to this post.


![]()
