In this tutorial, I’ll show you how to override Picasa’s auto-resizing feature and send photos in original quality.
Step 1
From Picasa, Click Tools > Options.
Step 2
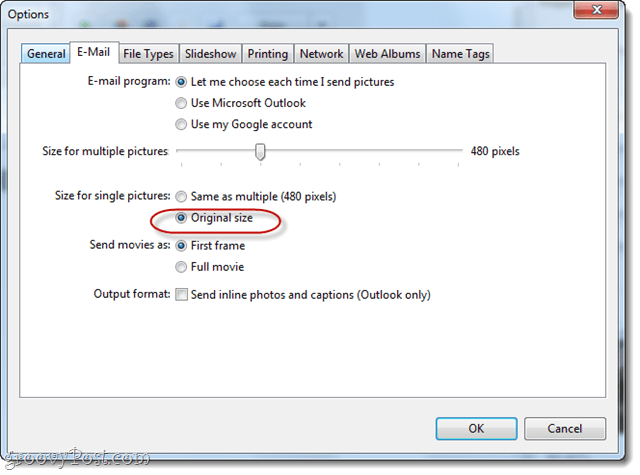
Click the Email tab.
Step 3
Under the setting for “Size for single picture,” select Original size.
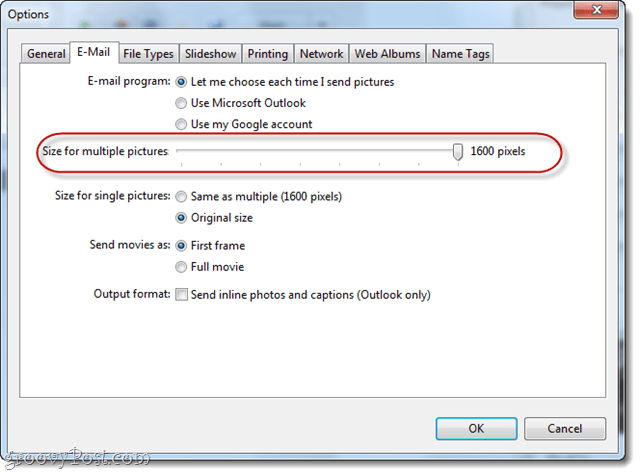
As you may have gathered, this only affects Picasa photos you send one at a time. If you want to send multiple high res photos, you can drag the slider for “Size for multiple pictures” up to 1600 pixels, but this obviously still isn’t full res.
Click OK when you’re done.
Step 4
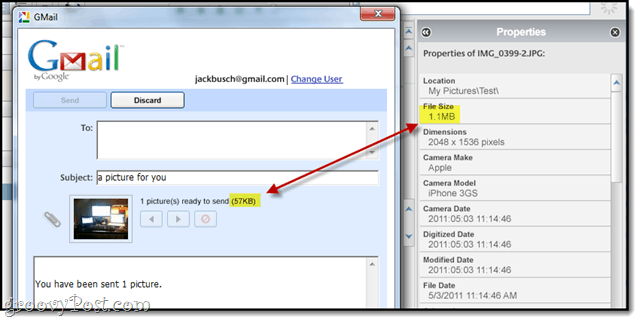
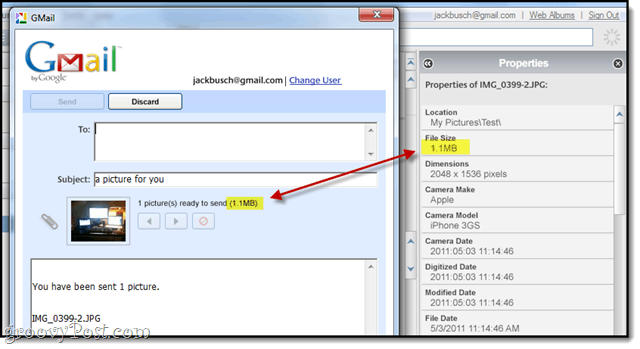
Now, when you select a single photo in Picasa and use the Email button, you’ll send a full resolution photo, suitable for printing and ready to inflate your data usage for the month!
Before:
After:
Conclusion
This just changes the behavior of the Email button in Picasa. There’s still nothing stopping you from attaching your photos manually by Right–clicking them and choosing Locate on Disk and then dragging them and dropping them into a Gmail message. You can even use this method for multiple photos. Just be aware that Gmail, Yahoo! and Hotmail imposes a 25 MB attachment limit on Gmail messages. Comment Name * Email *
Δ Save my name and email and send me emails as new comments are made to this post.


![]()
