Remote Support iPhone the Easy Way-Preferred System Requirement:
For this trick to work, the person with the iOS device needs to have a Mac running Yosemite (or higher) and an iPhone or iPad that uses a Lightning connector (not the 30-pin connector.) The device needs to be running iOS 8 or higher. We’ll call that the host–that’s the device you’re supporting. If you’re on a Mac running Yosemite, then that’s all either of you needs. Both of you need to know the Apple ID associated with iMessage on your devices.
Step 1: Start Quicktime Player and Have Them Plug in the iPhone or iPad
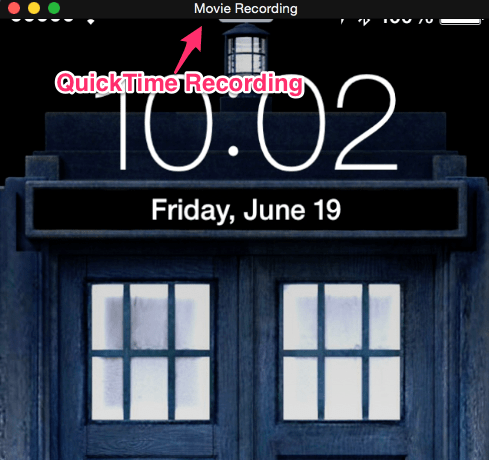
Quicktime Player in Yosemite can mirror (and record) the screen of an iOS 8 device with a Lightning connector. Once the person you’re helping plugs the iOS device into the Mac, open QuickTime Player and select New Movie Recording from the File Menu.
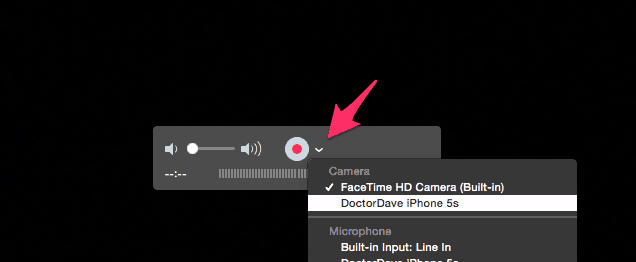
Then, click the arrow next to the red record button and choose the iPhone or iPad as the camera. At first, this doesn’t make sense. You don’t want the camera of the iPhone; you want the screen. Apple might explain this better in a later version of QuickTime Player, but for now, it works. Once the person you are helping does this, the iPhone’s screen will show up on the Mac. They don’t need to record the screen, but the recording might help them in the future.
Step 2: Remote into the Mac
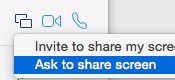
If you’re on a Mac with Yosemite, go to the Messages app and send them an iMessage. Once you’ve made contact, click Details and then the screen-sharing icon. From there, choose the Ask to share screen. Now you can remotely see their Mac and the iOS screen mirrored on that Mac. You can’t control the iPhone, but you can see what they are doing and explain any fixes or suggestions.
A Little Harder: Older Mac, Windows, or Older iOS device?
Step 1: Mirror The Screen to a Mac or PC
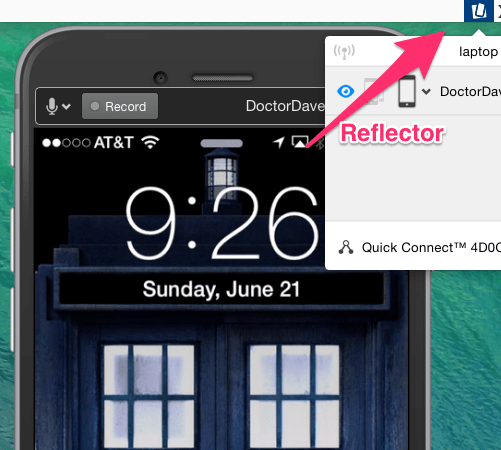
This configuration adds a few steps, but the concept is the same. Since iOS 7, Apple has supported mirroring of the screen to Airplay-compatible devices. If the person you’re helping doesn’t have a Mac, they’ll need to download the latest version of Reflector by AirSquirrels. This program lets you mirror an iPhone or iPad device to a desktop computer (Mac or PC) AirSquirrels has a seven-day trial, which is perfect for a one-time support session. After they install Reflector, they’ll go to the iOS control center (swipe up from the bottom.) On the Airplay icon, have them select the name of the computer and turn on Mirroring. AirSquirrels has a great support page on how to use the program to mirror an iPhone or iPad.
Step 2: Remote Control the Mac or PC
Our favorite remote control program is Join.me. It’s free and easy to use. Another option is Teamviewer. Both you and the person you’re helping need to run the same program. Once you do that, the concept is the same as before. You’ll remotely view their computer and see the iOS screen mirrored. With this option, you probably won’t get to record the session, so have them take careful notes. iOS is pretty simple for most people, so you won’t have to do this too often. Typically I’ve done this type of support to help with confusion setting up email accounts or Apple IDs. Comment Name * Email *
Δ Save my name and email and send me emails as new comments are made to this post.

![]()

![]()
